Hello, digital marketers and website owners! Are you aiming to manage your ads more efficiently by adding an ads.txt to your WordPress site, but prefer not to overload with plugins? Well, you’re in exactly the right place. I’m here to guide you through every step of this process—sans plugins—ensuring you maintain control over your ad management and optimize your revenue streams effectively.
What is Ads.txt?
Ads.txt stands for Authorized Digital Sellers and is an IAB initiative designed to ensure that your ad inventory is only sold through sellers (such as AdSense, AdExchange, or other ad platforms) that you’ve approved. This not only helps in preventing ad fraud but also boosts advertiser confidence in buying ad inventory from your site.
Why Add Ads.txt Manually?
Opting to add an ads.txt file manually to your WordPress site can seem a bit daunting at first, but it offers control and transparency over the ad sources. Plugins are handy, but they can bloat your site’s loading time and sometimes complicate what is fundamentally a simple process.
Step-by-Step Guide to Adding Ads.txt Manually
Step 1: Create Your Ads.txt File
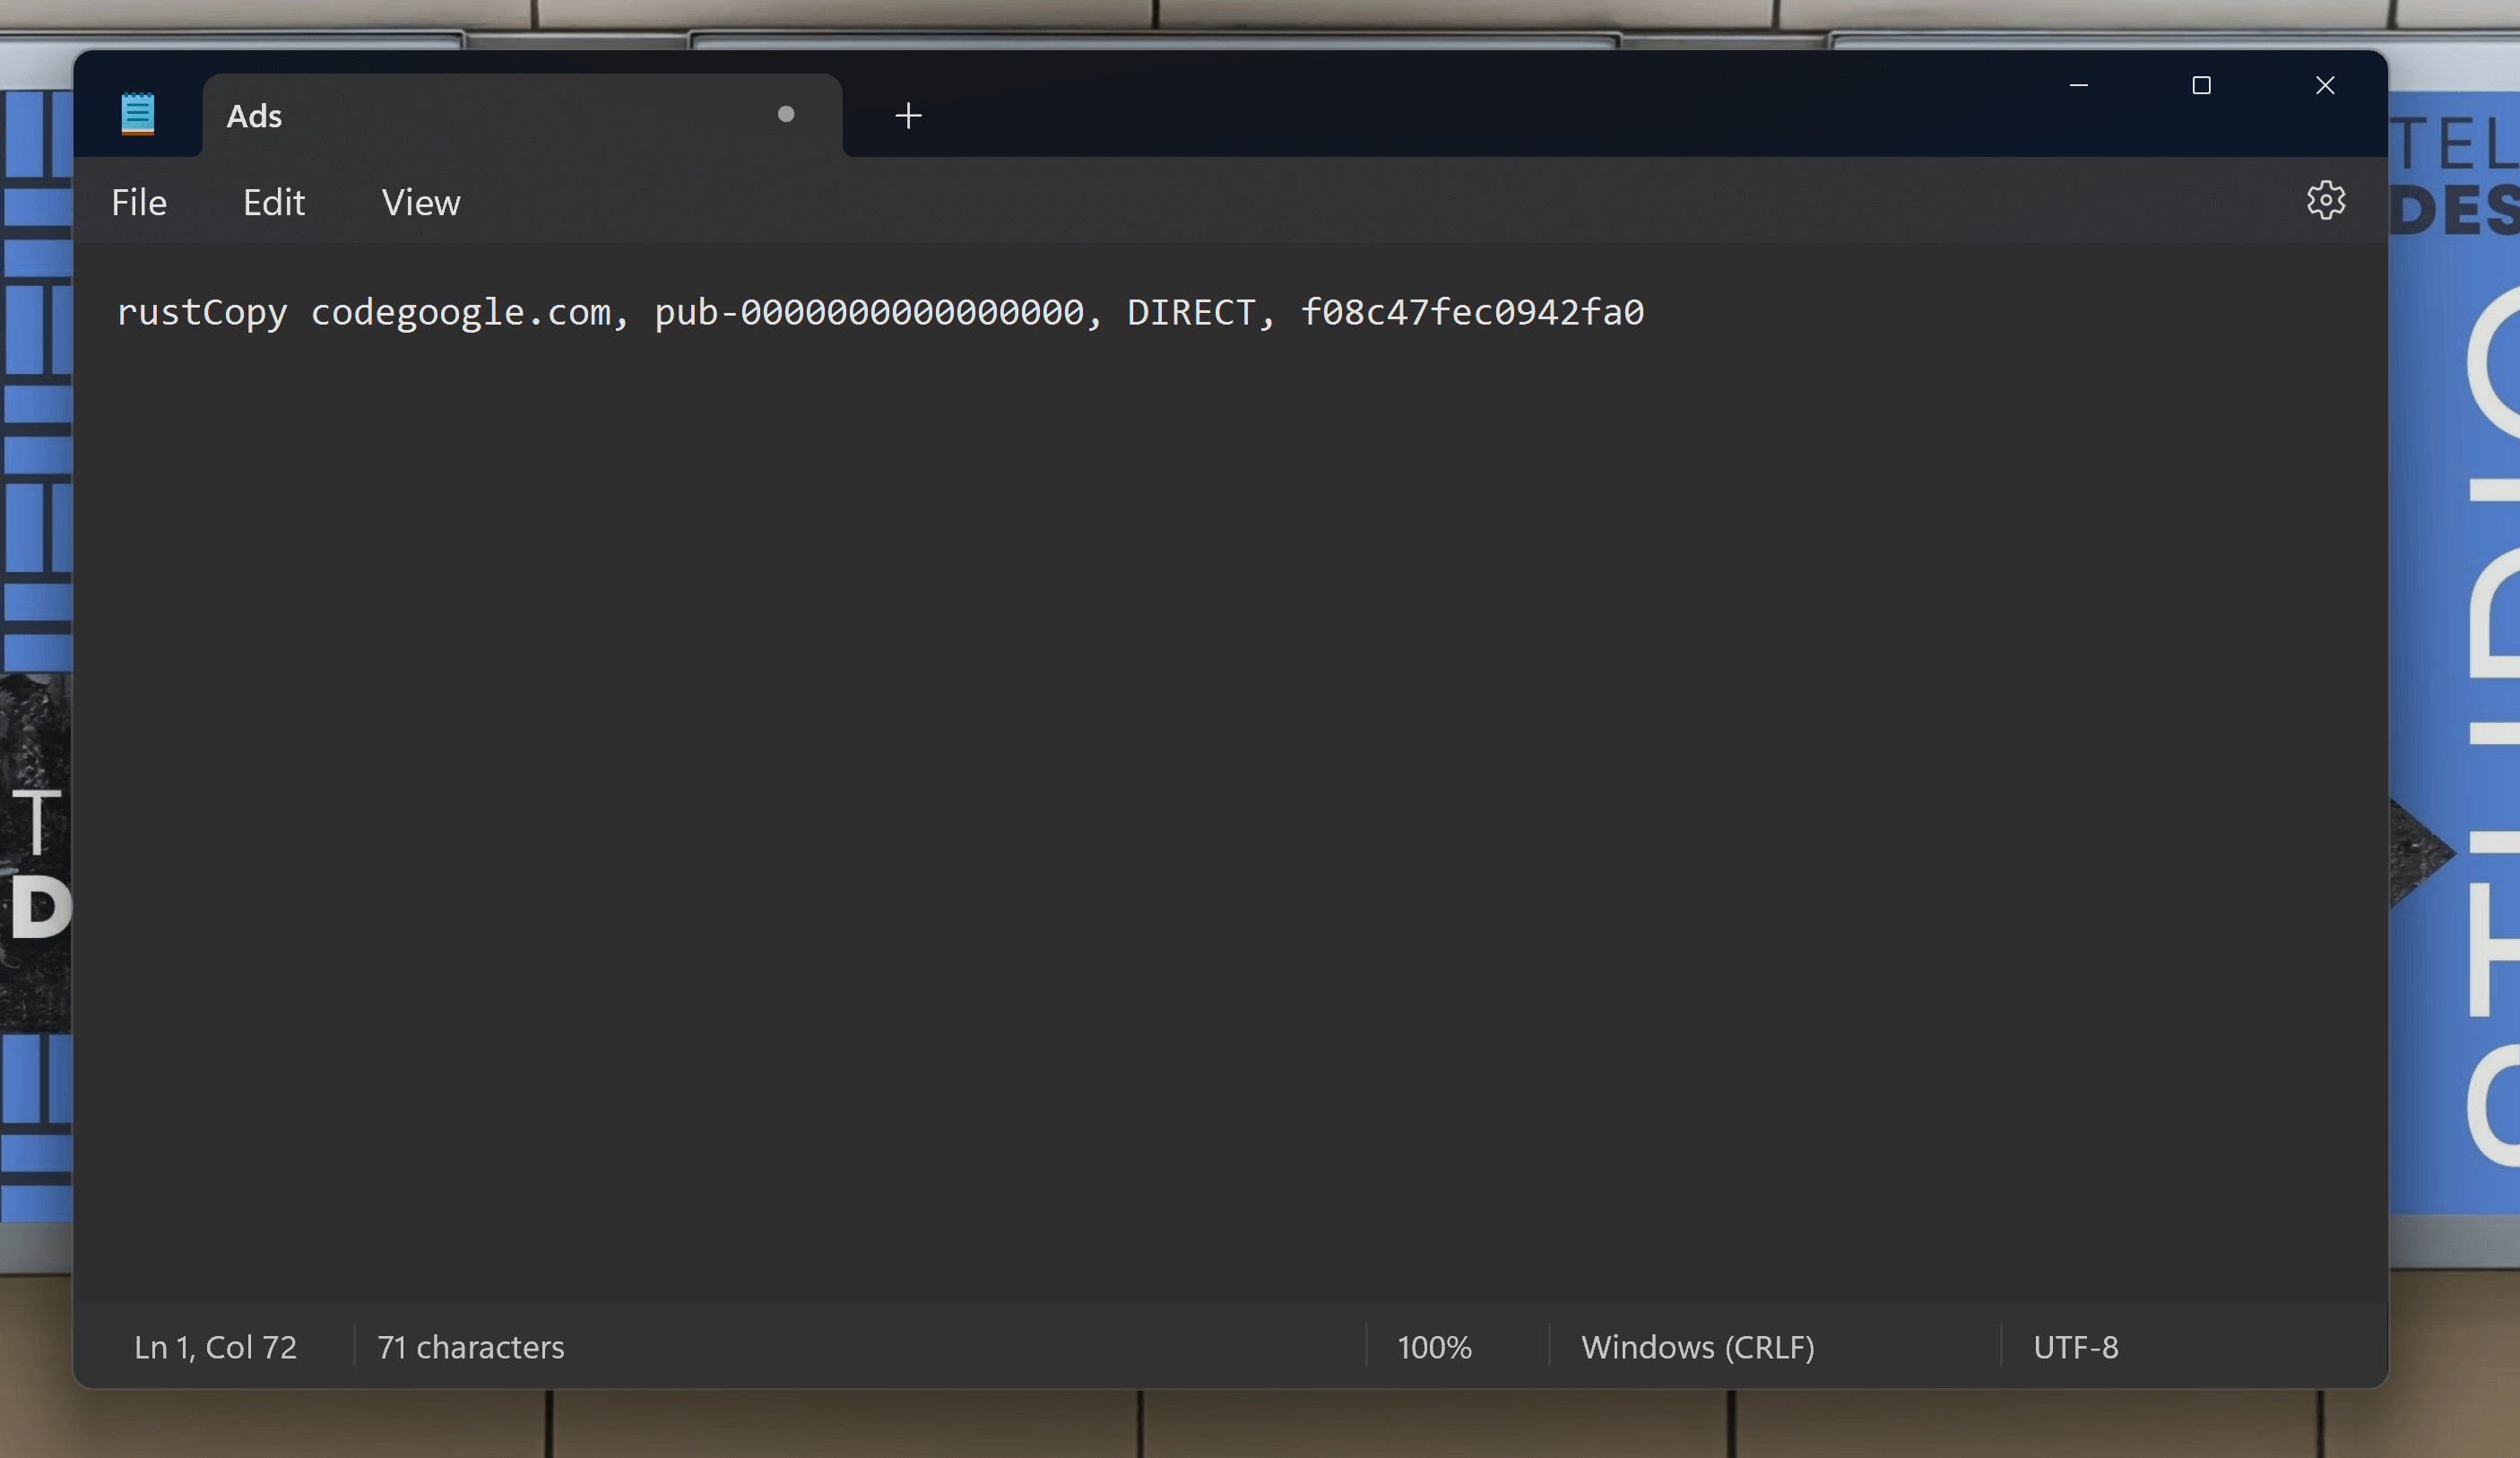
Start by opening a plain text editor like Notepad or any other editor that doesn’t add formatting. Here, you’ll list the lines provided by your advertising networks. Typically, each line in an ads.txt file looks like this:
rustCopy codegoogle.com, pub-0000000000000000, DIRECT, f08c47fec0942fa0
Each element represents the domain name of the advertising system, your publisher ID, the type of relationship (DIRECT or RESELLER), and an optional identifier of the advertising platform.
Step 2: Save and Upload Your File
Once your ads.txt file is ready, save it as “ads.txt”.
Next, you’ll need to upload this file to the root directory of your website using an FTP client or the file manager provided by your web hosting service. The root directory is usually where your wp-content, wp-includes, and wp-admin folders are located.
I use FileZilla
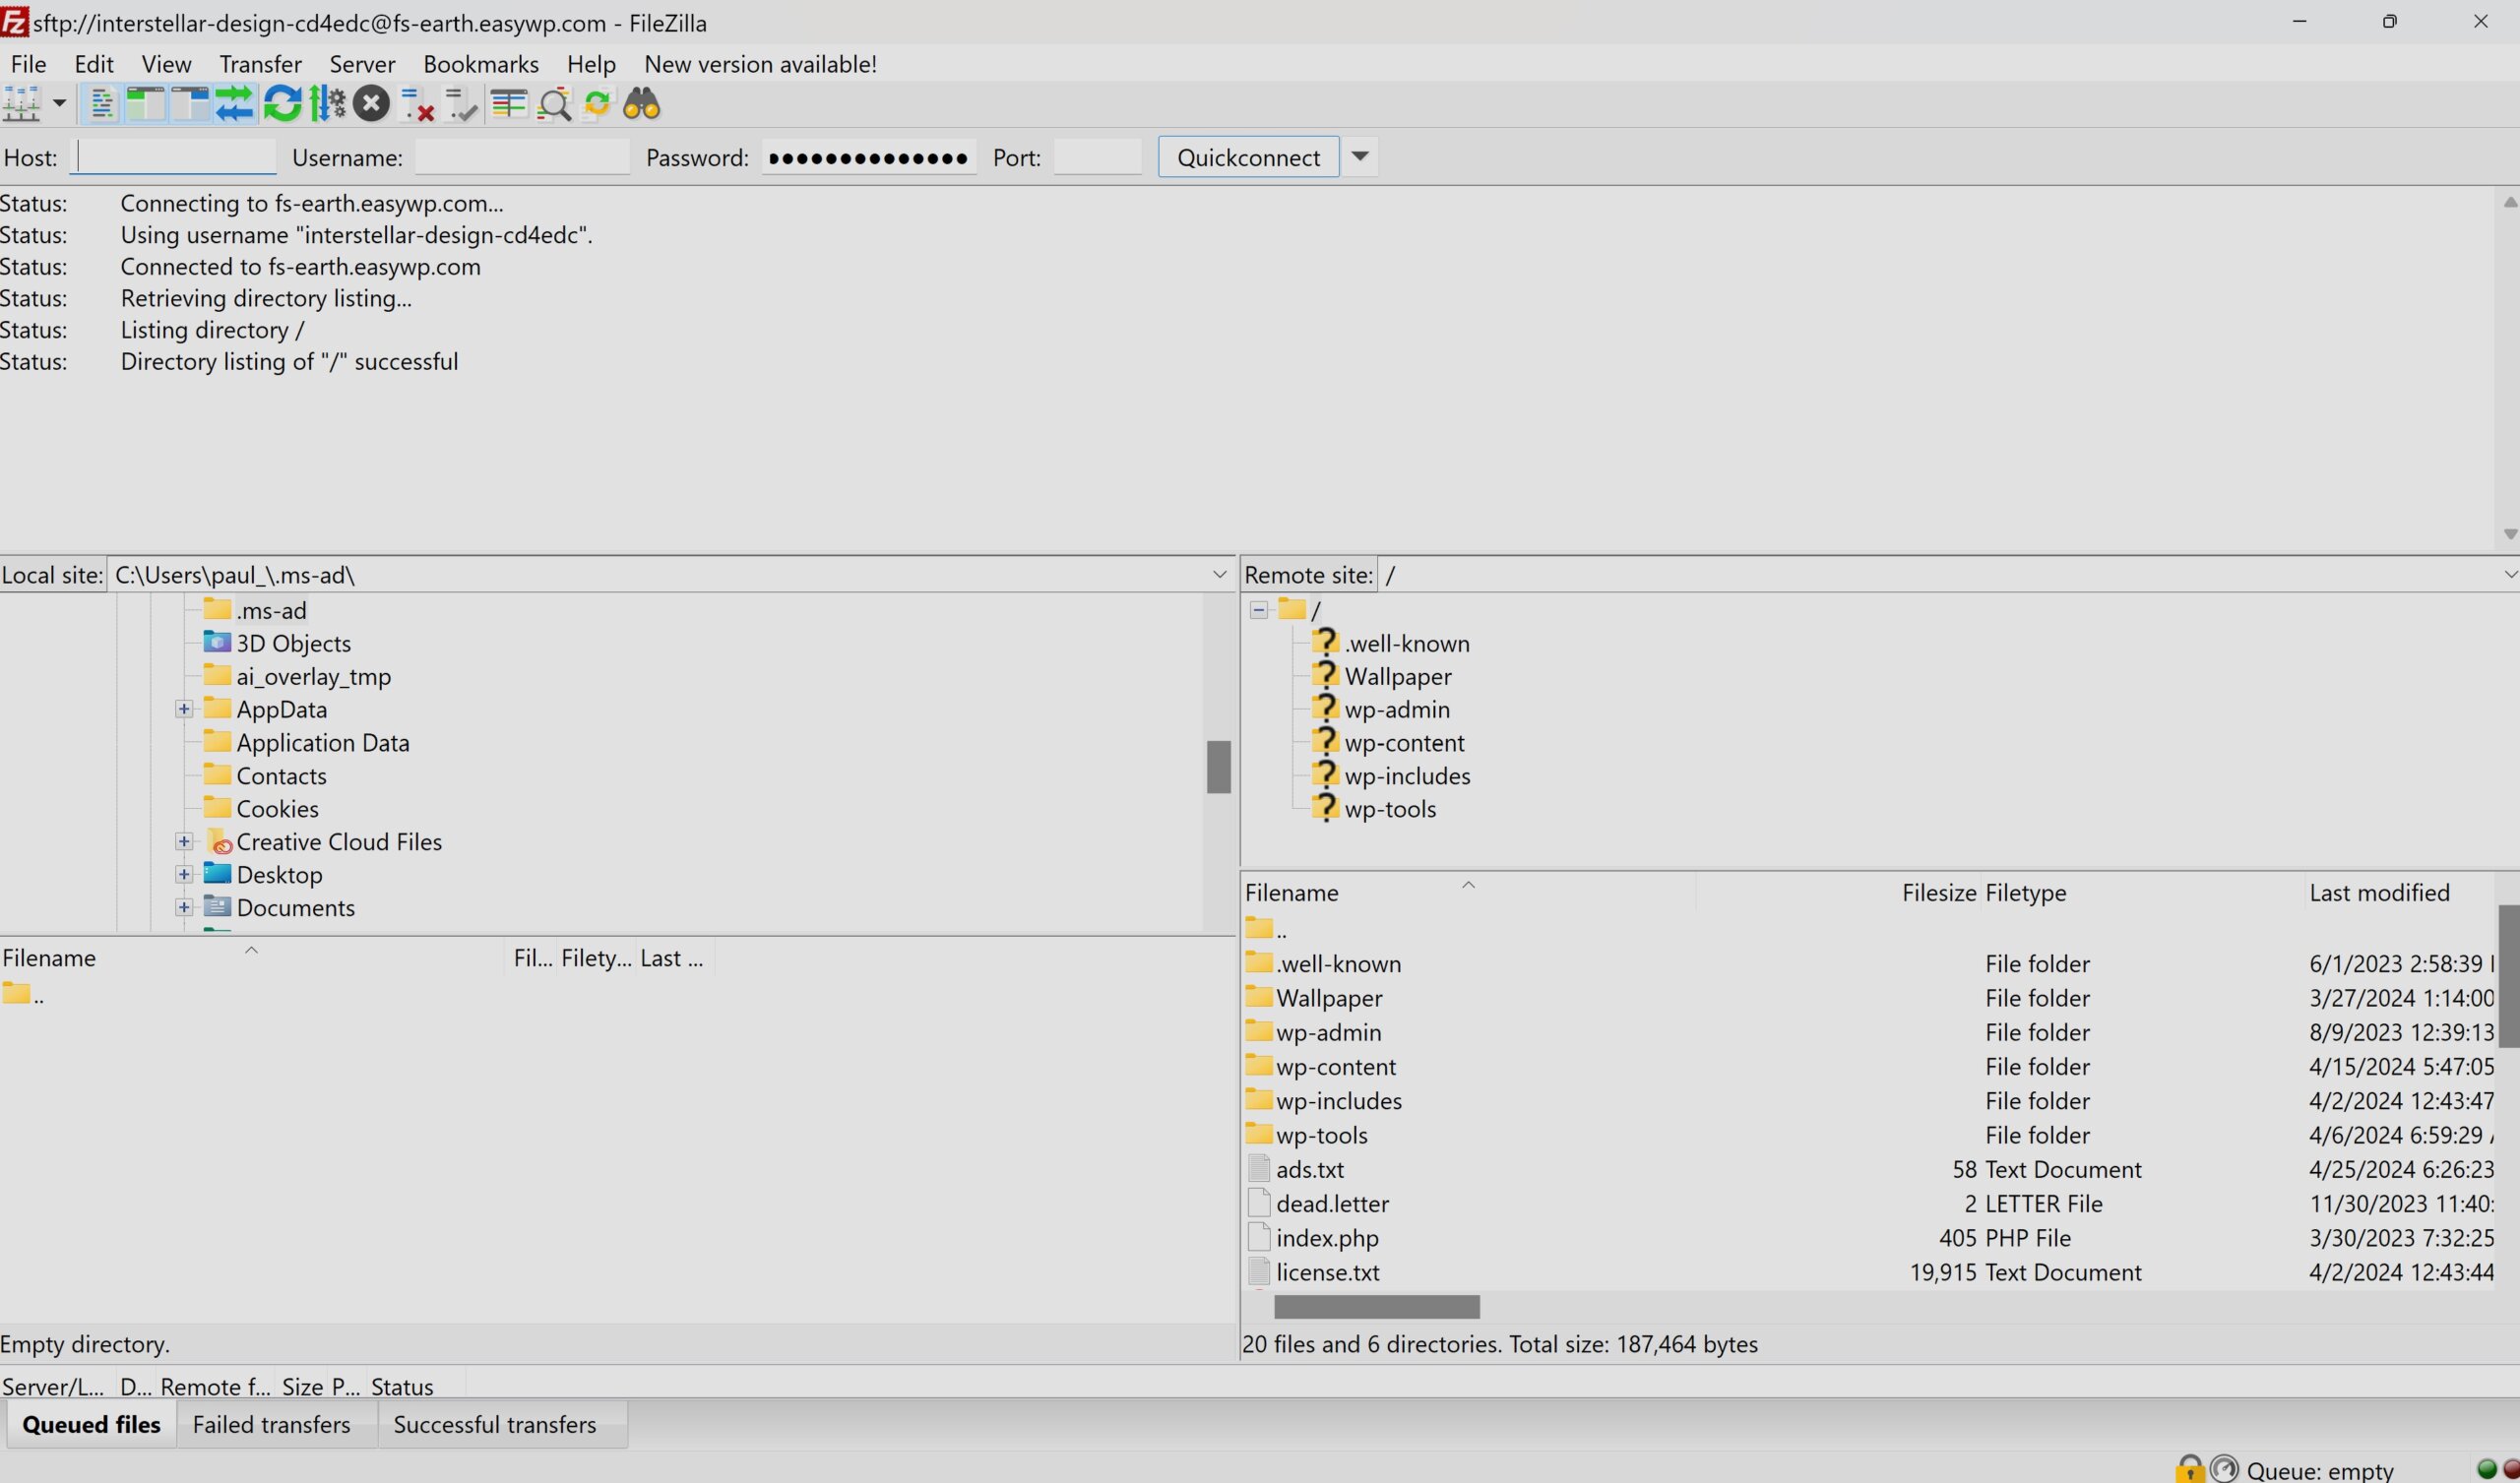
** Once uploaded, give it 15 to 30 minutes to sync.
Step 3: Verify Your Ads.txt File
To ensure that your ads.txt file is correctly installed, simply type in your website’s URL followed by /ads.txt. For example:
codehttp://www.yoursite.com/ads.txt
If it displays the contents of your ads.txt file, you’ve done everything right! (remember, it may take some time for this to appear after you uploaded. So keep checking back if you’re getting a 404 error).
Step 4: Monitor and Update as Needed
Your ads.txt file isn’t something you can set and forget. Monitor the file periodically and update it as you partner with new advertisers or discontinue relationships with others.
Conclusion
Adding an ads.txt file to your WordPress site without a plugin is straightforward if you follow these steps. It not only helps in fighting against fraudulent ad sales but also supports a transparent digital ad ecosystem. By managing this small but mighty file, you enhance your site’s integrity and maintain your revenue’s health.
Remember, staying proactive about your site’s ad management strategy is crucial in the ever-evolving digital landscape. Ready to boost your advertising efforts? Get started today!
FAQs
Q: What happens if I make a mistake in my ads.txt file? A: Errors in your ads.txt file can potentially block legitimate ad sales, so it’s crucial to ensure accuracy. Double-check each entry for typos or incorrect information.
Q: Can I have multiple ads.txt files on different parts of my site? A: No, you should only have one ads.txt file, and it must be placed in the root directory of your site to ensure that it is recognized by ad platforms.
Q: Is it necessary to add an ads.txt file? A: While not mandatory, adding an ads.txt file is highly recommended if you’re selling ad space on your site. It increases transparency and helps prevent ad fraud, benefiting both you and your advertisers.
In: